


One Finger Fit for Apple Watch Bands: Tool Free Adjustments by Band Type
Yes, most Apple Watch bands can be adjusted without tools using built-in clasps, magnets, or finger-accessible sliders that come standard on modern designs. Some metal link bands still need a pin removed for a major size change, but that job usually only requires a stable surface and a steady hand, not a kit. If a band or connector ever resists or won’t click into place, stop immediately and follow Apple’s official release guidance rather than forcing it.
TL;DR:
- Most Apple Watch bands can be adjusted by hand using built-in clasps, magnets, or sliders, eliminating the need for tools unless a major size change is needed.
- Proper orientation, cleanliness, and gentle incremental adjustments are crucial to avoid damage or improper fit during tool-free band resizing.
- Metal link bands require attention to directional arrows or holes for pin removal, with steady, straight pressure as the key to safe adjustment.
- Magnetic, Milanese loop, and hook-and-loop bands are designed for tool-free adjustment and should be repositioned carefully to avoid uneven pressure or slipping.
- When bands show signs of stress, resistance, or damage beyond simple resizing, replacing them is the safest choice to prevent hardware damage or sensor issues.
Table of Contents
- How Do You Adjust an Apple Watch Band Without Tools?
- How Do You Resize a Metal Link Apple Watch Band Without Pin Tools?
- Can You Adjust Magnetic and Loop-Style Bands by Hand?
- Why Won’t My Band Click, and Why Does My Watch Keep Sliding?
- What Design Features Make Bands Easier to Adjust Without Tools?
- When Should You Stop Adjusting and Just Replace the Band?
- Which WizeBand Options Skip the Guesswork Entirely?
- Where Can You Verify Official Apple Watch Band Instructions?
- Sources
How Do You Adjust an Apple Watch Band Without Tools?
Before touching any clasp or link, run through a few checks that apply no matter what band you’re wearing. Skipping this step is the single biggest reason people end up with a scratched band, a bent pin, or a watch that won’t sit flush against the wrist.
Start with the release mechanism itself. Apple’s official instructions say to place the watch face down on a soft surface, press and hold the small button on the back of the band, then slide the band across and off the frame. Do this over a towel or cloth. Apple Watches slide off metal frames faster than people expect, and a bare countertop is an easy way to scratch the case.
Orientation trips up more people than the mechanism itself. Any text or logo printed on the underside of the band should face you as you slide it into the slot. Insert it upside down and it either won’t click or it’ll click into a position that puts pressure on the wrong part of the connector. Apple’s own removal and installation guidance is explicit on this point: never force a band into the slot. If it’s not sliding in smoothly, pull back and check the direction before you push harder.
Fit affects more than comfort. The watch relies on consistent skin contact to read your pulse and detect when it’s on your wrist, so a band that’s too loose can quietly throw off heart-rate data and wrist-detection accuracy. Apple’s guidance on wearing the watch confirms the band needs to be snug enough to maintain skin contact while still letting skin breathe. Too tight causes red marks, indentation lines, or irritation after a few hours. Too loose lets the watch slide down toward your hand, which throws off both comfort and sensor readings.
A few signs tell you which direction to adjust:
- Too tight: visible indentation on the skin, throbbing after 30 minutes, or a watch face that feels stuck rather than resting.
- Too loose: the watch rotates around your wrist, slides toward your hand when you shake it, or the back case doesn’t stay flush against skin.
- Just right: you can fit roughly one finger between the band and your wrist, and the watch sits on top of the wrist bone rather than sliding past it.
Know when to stop entirely. Bent pins, a connector that clicks partway but won’t seat, or visible cracks in a plastic housing all mean it’s time to put the band down rather than keep pushing.
Pro Tip: Do your first-ever adjustment in daylight or under a bright lamp. Metal link bands hide their directional arrows and tiny orientation marks well in dim light, and squinting at them under a desk lamp is how most people miss the mark that would’ve saved them a wasted attempt.
Picking the correct size group at checkout also saves you from needing dramatic adjustments later. Choosing the right band size up front means you’re fine-tuning a few millimeters instead of trying to force a mismatched band to work.
How Do You Resize a Metal Link Apple Watch Band Without Pin Tools?
Metal link bands look intimidating, but the actual mechanics are simple once you know what you’re looking for. Every removable link has a small arrow or a tiny hole stamped into the metal on one side. That mark tells you the direction the pin needs to travel to come out. Miss it and try pushing from the wrong side, and you’ll just mash the pin head against the metal.
Here’s the process:
- Find the removable links. They usually sit closest to the clasp, and they’re the only links with that directional arrow or hole visible.
- Set up your workspace. Lay a soft cloth or towel on a stable, hard surface (a countertop under the cloth, not a couch cushion) so you have a firm backstop for pushing.
- Push the pin, following the arrow. A straightened paperclip, a sturdy sewing needle, or even a strong toothpick can substitute for a pin tool if you apply steady, even pressure directly in line with the arrow. Avoid any twisting motion, which can mushroom or bend the pin head and jam it permanently.
- Catch and store the parts. Small pins and springs vanish into carpet fibers in half a second. Push each one directly into a labeled dish or a shallow container so nothing rolls away.
- Reassemble and test. Slide the links back together, push the pin back through until it’s flush, then gently flex the band to confirm there’s no wobble or looseness at the joint.
Before you remove a single link, check whether your band actually has a quick-adjust clasp or a micro-adjust notch instead. Several modern metal bands now build in a finger-accessible spring-loaded adjustment that lets you shift the fit by a few millimeters without ever touching a pin. If your clasp has more than one closure position, try that first. It’s faster, and it eliminates the risk of losing a spring bar altogether.
Pro Tip: Count your links before you start removing anything, and lay them out in order on the towel as you go. Reassembling five identical-looking metal links from memory after they’ve scattered is how a five-minute adjustment turns into twenty.
Can You Adjust Magnetic and Loop-Style Bands by Hand?
Milanese loop bands, magnetic straps, and hook-and-loop sport bands were built for tool-free adjustment from day one. They’re worth reaching for if you dread the idea of pin removal altogether.
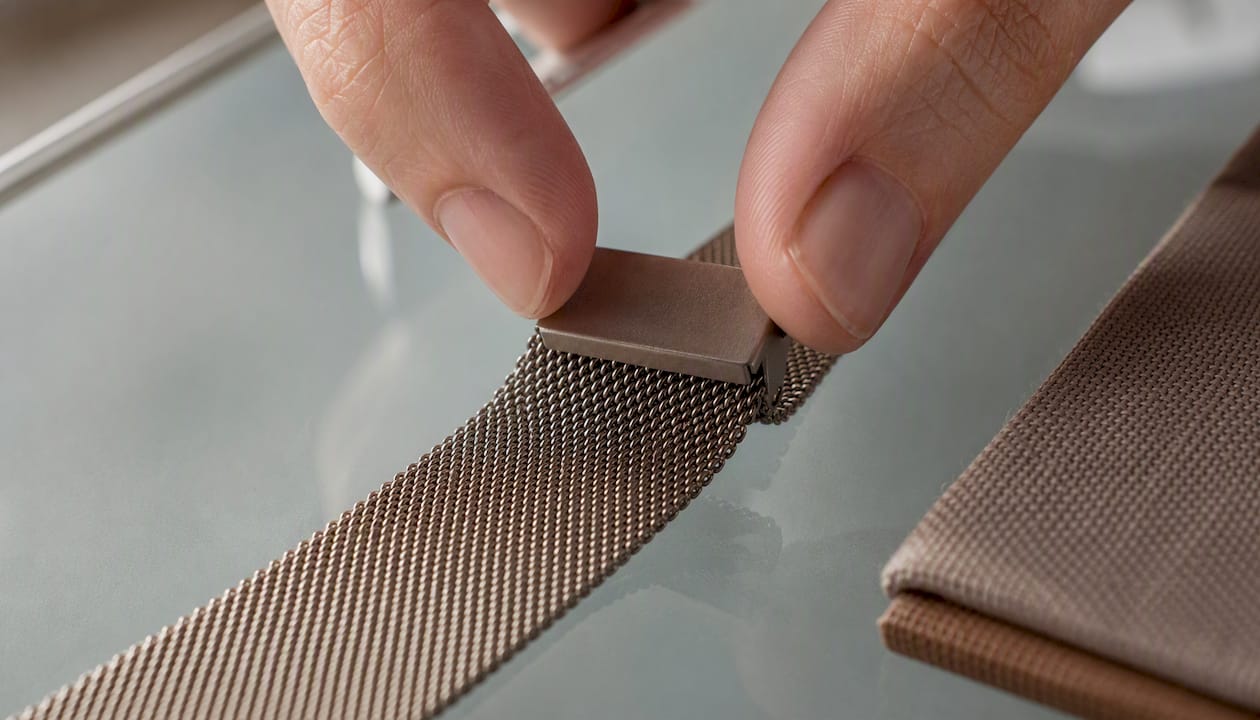
Milanese loop bands use a small magnetic clamp that slides along the woven mesh. Lift the clamp evenly with two fingers, one on each side, so it doesn’t tilt and pinch the mesh unevenly. Slide it to the new position, then press down firmly until you feel it seat flush against the mesh. If it feels crooked or one side is higher than the other, lift and reset rather than pressing harder.
Magnetic bands rely on finding what’s often called the sweet spot, the point where the magnetic strip inside the band clicks flush against itself with no gap. Some magnetic strap designs advertise near-infinite adjustment because you can overlap the band at any point along its length rather than at fixed notches. Slide it until the overlap feels secure, then give your wrist a shake test. If it pinches skin between the overlapping layers, you’ve gone a notch too tight.
Sport and loop-style bands with hook-and-loop fasteners or micro-notch buckles offer the finest adjustment of any band type. Some sport straps now include as many as 18 closely spaced notches, which means you can dial in a fit down to a few millimeters without ever cutting the band or touching a pin.
- Rethread hook-and-loop bands slowly, checking that the strap lies flat rather than twisted underneath.
- Move one notch at a time on buckle-style bands rather than jumping two or three positions.
- Test the fit by rotating your wrist in a full circle. If the band shifts, tighten by one increment before wearing it out the door.
Why Won’t My Band Click, and Why Does My Watch Keep Sliding?
Most tool-free adjustment problems trace back to one of three causes: orientation, debris, or over-tightening in the wrong spot.
Band won’t click into place. Hold the release button fully while you reinsert the band. A half-pressed button is the most common reason a band seems to stick halfway. Double-check orientation, since upside-down insertion is a frequent cause of a band that clicks partway but never locks. Wipe the slot with a dry cloth first. Lint and pocket debris build up in that channel faster than most people expect.
Watch keeps sliding down your wrist. Tighten in small increments rather than jumping several notches at once. Apple’s own guidance recommends incremental adjustments over one large change to protect both comfort and sensor accuracy. Sweat and body lotion also reduce the natural grip between skin and band material, so a watch that fit fine in the morning can slide by afternoon.
Irritation or inconsistent heart-rate readings. Loosen the band by one position and move the watch slightly higher on the wrist, closer to the wrist bone. A band riding too low on the wrist creates the same sensor problems as one that’s simply too loose.
- Clean the release slot and clasp weekly if you wear the watch daily.
- Rotate between two band widths if one style consistently leaves marks.
- Never force a stuck connector twice in a row. If it resisted once, something is misaligned, not just stiff.
What Design Features Make Bands Easier to Adjust Without Tools?
Wizeband builds every quick-adjust clasp around the idea that you shouldn’t need a kit spread across your kitchen table just to change a fit by a few millimeters. The quick-adjust mechanism built into several of the metal families lets you shift the band by hand, and the two simple size groups at checkout remove the guesswork that usually leads to over-adjusting in the first place.
If your priority is minimal or zero pin removal, look at the metal straps with a butterfly or quick-adjust clasp rather than a traditional pin-and-link closure. Those designs are built around finger adjustments as the default, not the exception. Wizeband also documents the full tool-free replacement process for readers who want a walkthrough with photos alongside the written steps, plus a compatibility rundown for Apple Watch bands across Series 4 through Ultra 2.
When Should You Stop Adjusting and Just Replace the Band?
A careful home adjustment is worth trying anytime you’re just fine-tuning fit by a link or a notch. Where I’d draw the line is anything involving a bent pin, a clasp that’s stopped clicking after multiple attempts, or metal that’s already showing stress marks from a prior repair.
At that point you’re not saving money by pushing further. You’re risking the band or the watch case. Start with the least invasive adjustment your band offers, and reach for a proper Starter Kit before you improvise with whatever’s in a kitchen drawer.
— John
Which WizeBand Options Skip the Guesswork Entirely?
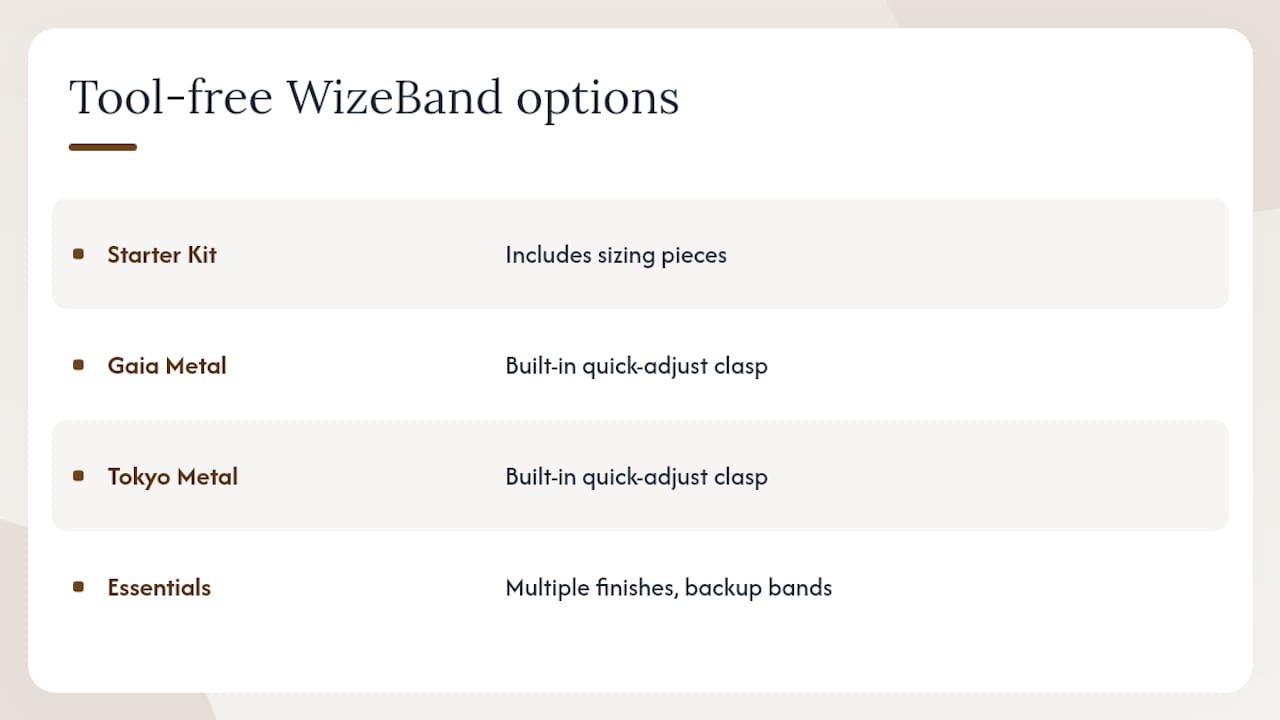
If you’d rather not spend a Saturday afternoon pushing pins out with a paperclip, Wizeband’s quick-adjust metal straps solve the problem at the design level instead of asking you to solve it with hand tools. The Starter Kit pairs a band with the sizing pieces you need to get a precise fit on the first try, which is the fastest way to skip repeated trial-and-error adjustments altogether.

For a metal strap with a quick-adjust clasp built in from the start, the Gaia Metal Strap and the Tokyo Metal Strap both let you fine-tune fit by hand without ever touching a link pin. If you want backup options in different finishes for different outfits, the Essentials Bundle covers that without repeat checkout trips.
Before you buy, confirm your size group against your case measurement, and check whether the clasp is a butterfly, magnetic, or link style, since that determines exactly how much tool-free adjustment range you’ll get day to day.
Where Can You Verify Official Apple Watch Band Instructions?
For official steps, see Apple’s band removal guidance and fit instructions for sensor accuracy. Always follow Apple’s steps before forcing any hardware.
Sources
- Change your Apple Watch band - Apple Support
- Finestone tool-free grade-5 titanium Apple Watch band (9to5toys)
Recommended
Aus dem Blog
Alle anzeigen


Hinterlassen Sie einen Kommentar