


Watch Strap Replacement: Your Complete DIY Guide
Yes, you can replace most watch straps at home. For standard watches, measure the lug width in millimeters and pick a matching strap. For Apple Watch, confirm your case size and choose a compatible band. The swap itself can be completed in under five minutes with standard spring-bar straps or in under 10 seconds per side with quick-release straps once you know the method.
Here is what you need to decide right now:
- Lug width or case size first. Common lug widths are 18mm, 20mm, 22mm, and 24mm. Apple Watch uses case-size-based sizing (40/41mm or 44/45/49mm groups).
- Quick-release or spring-bar? Quick-release straps swap in under 10 seconds with no tools. Standard spring-bar straps need a $3–$8 tool.
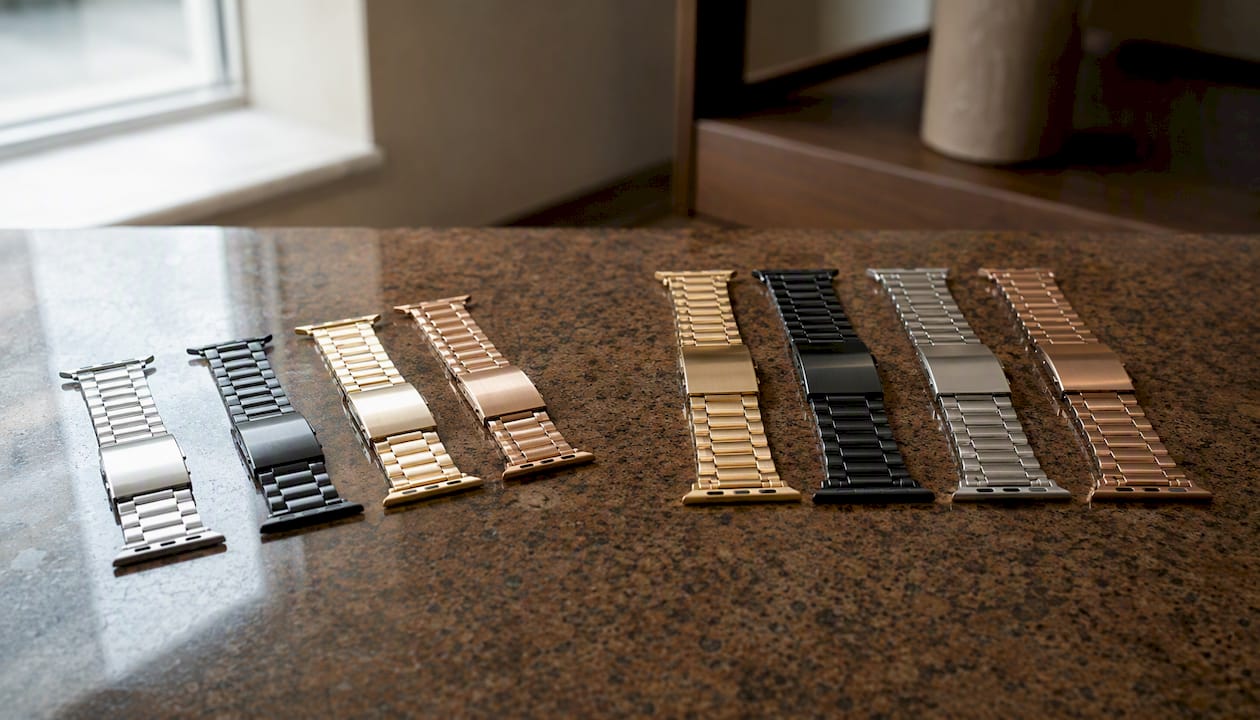
- Apple Watch owners: Wizeband’s metal and ceramic bands cover Series 4–10, SE, and Ultra 2, offered in two size groups so you pick the right fit without measuring every sub-millimeter variant.
Table of Contents
- How do you find the right replacement strap size?
- What tools do you need for a watch band replacement?
- Step-by-step instructions for the three main swap methods
- Which strap material should you choose?
- How much does watch strap replacement cost?
- Key Takeaways
- The case for DIY first
- Wizeband metal Apple Watch bands: ready to wear, easy to size
- Useful sources and further reading
How do you find the right replacement strap size?
Getting the size right before you buy saves a return trip. The measurement is simple, but the method matters.
Measuring lug width for standard watches
Lug width is the distance between the inside faces of the two lugs where the strap attaches. Measure in millimeters with a digital caliper or a steel ruler held flat across the gap. Common sizes are 18mm, 20mm, 22mm, and 24mm. If your reading falls between two sizes, round down to the smaller one.
Pro Tip: Measure twice, and check the watch manufacturer’s spec sheet if you have it. A 1mm error means the strap will not seat flush, and the spring bars may not reach both lug holes.
Apple Watch sizing
Apple Watch does not use lug-width sizing. Instead, the band attaches to the case via a proprietary slide-rail system, and Apple’s official guidance groups compatible bands by case size. The two main groups are 40mm/41mm and 44mm/45mm/49mm. Ultra 2 uses the larger group with some band-specific exceptions.
| Apple Watch Case Size | Band Size Group | Notes |
|---|---|---|
| 40mm (Series 4–6, SE 1st gen) | Small/Medium | Standard band width |
| 41mm (Series 7–10, SE 2nd gen) | Small/Medium | Fits 40mm bands |
| 44mm (Series 4–6, SE 1st gen) | Medium/Large | Standard band width |
| 45mm (Series 7–10, SE 2nd gen) | Medium/Large | Fits 44mm bands |
| 49mm (Ultra 2) | Medium/Large | Check band-specific compatibility |
If you are unsure whether a 41mm band fits your 40mm case, the answer is yes for most third-party bands. Wizeband’s 41mm-to-40mm compatibility guide walks through the specifics.
One situation to flag: watches with integrated or proprietary lug systems (common on some luxury sport models) cannot accept standard replacement straps. If the strap appears to be molded into the case rather than attached via visible pins, stop and consult the manufacturer before attempting a swap.
What tools do you need for a watch band replacement?
The tool list is short. For most swaps, you need one item.
Essential tools
- Spring bar tool ($3–$8 for a basic model; the Bergeon 6767 is the professional standard at around $30). The forked end compresses the spring bar; the pointed end helps guide it back into the lug hole.
Tools for more advanced work
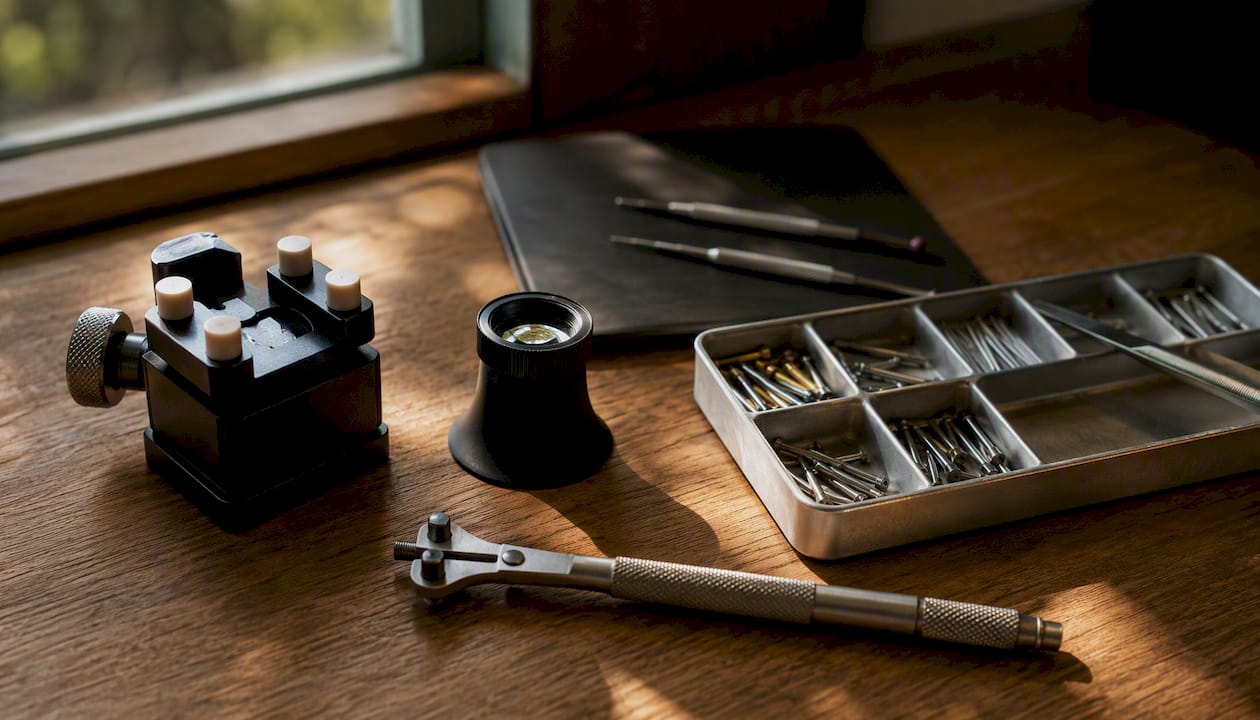
Serious hobbyists assembling a home bench will want a case holder and stable bench setup for link removal and case work, plus a loupe and a parts tray to keep small pins organized. For tasks that go beyond strap swaps, such as opening a screw-down case back to service gaskets, a specialist case wrench is the right tool. Entry-level options like the Pittsburgh Watch Case Opener are affordable for occasional use, but technique matters as much as the tool itself.
When you need no tools at all
Quick-release straps use a small lever on the spring bar that you operate with a fingernail. Citizen documents single-lever and double-lever quick-release systems, as well as button-release mounts, all of which swap without any tool. Apple Watch slide-release bands also require no tools: press the band-release button and slide.
Pro Tip: Before your first spring-bar swap, practice on an inexpensive strap. The tool can slip and scratch a lug if you push from the wrong angle. A five-minute practice run on a $5 strap is worth it.
Step-by-step instructions for the three main swap methods
Setup (applies to all methods)
Lay the watch face-down on a soft microfiber cloth. Gather your tools and keep a small tray nearby for spring bars. Apply low-tack masking tape over the lugs if you want extra scratch protection when using metal tools.
Method A: Quick-release straps (tool-free, under 10 seconds per side)
- Flip the strap over to expose the small lever on the spring bar.
- Push the lever inward with your fingernail or a toothpick.
- Slide the strap out of the lug channel.
- Align the new strap, compress the lever, and slide it in until it seats.
- Release the lever and tug the strap gently to confirm it is locked.
Total time: under 10 seconds per side.
Method B: Standard spring-bar straps
iFixit’s repair guide recommends working from the back of the watch and compressing the spring bar inward toward the strap, not pushing from the outside of the lug. This is the key technique that prevents the tool from slipping and scratching the lug tip.
- Position the forked end of the spring bar tool against the shoulder of the spring bar, approaching from inside the strap.
- Compress the bar inward to retract the pin from the lug hole.
- Lift the strap end free while keeping the bar compressed.
- Remove the spring bar and set it in your parts tray.
- Repeat on the other side.
- Thread the new strap through the lug channel, insert the spring bar, compress it, and guide the pin into the lug hole.
- Listen and feel for the click that confirms the pin is seated.
- Tug the strap firmly. If it pulls free, the bar is not seated and you need to repeat step 6.
First-time swap: allow 10–15 minutes. After two or three attempts, most people complete both sides in under five minutes.
Approaching the spring bar from the inside of the strap rather than the outside of the lug is the single technique difference between a clean swap and a scratched case. Professionals do it this way every time.
Method C: Apple Watch slide-release bands
Apple Support details the process for every band type, including the Link Bracelet, Solo Loop, Braided Solo Loop, and Milanese Loop.
- Press and hold the band-release button on the back of the watch.
- Slide the band sideways out of the slot while holding the button.
- Align the new band with the slot and slide it in until you hear a click.
- Release the button and tug to confirm the band is locked.
For the Link Bracelet, press the release button on each link section to separate the two halves before sliding them out. Ultra 2 bands follow the same slide-release process but use the larger band slot.
Which strap material should you choose?
The right material depends on how you use the watch, not just how it looks. Here is a practical breakdown, with a guide to luxury bracelet types for readers who want deeper context on metal styles.
| Material | Best For | Water Resistance | Durability | Maintenance |
|---|---|---|---|---|
| Leather | Office, dress, formal | Low | Moderate | Wipe dry; condition periodically |
| Silicone / FKM rubber | Sport, daily active use | High | High | Rinse with water |
| NATO / nylon | Casual, travel, outdoor | Moderate | High | Machine washable |
| Metal (stainless steel) | Everyday, dress, jewelry look | High | Very high | Wipe clean |
| Ceramic | Dress, premium look | High | High (but brittle) | Wipe clean; avoid drops |
A few points that the table does not capture:
- Allergy considerations. Nickel sensitivity is common. Look for 316L stainless steel (surgical grade) or titanium if you react to standard metal bands. Silicone and FKM rubber are hypoallergenic.
- Climate. Leather degrades faster in humid climates or with heavy sweat exposure. Silicone and NATO straps handle both without issue.
- Wizeband’s metal and ceramic Apple Watch bands are built from 316L stainless steel with jewelry-style clasps and quick-adjust systems, targeting Apple Watch owners who want a band that looks like fine jewelry and holds up to daily wear. The leather watch strap guide covers leather-specific care and swap tips if that material is your preference.
Quick selection framework: choose by primary activity first (sport, office, or formal), then filter by secondary criteria such as comfort, maintenance tolerance, and longevity. Metal wins on longevity and style; silicone wins on practicality.
How much does watch strap replacement cost?
DIY is almost always cheaper. The gap is significant.
| Method | Strap Cost | Tool Cost | Total | Time |
|---|---|---|---|---|
| Quick-release DIY | $10–$40 | — | $10–$40 | Under 1 minute |
| Standard spring-bar DIY | $6–$25 | $3–$8 (one-time) | $6–$25 | 5–15 min (first time) |
| Professional (jeweler) | Included in labor | N/A | $35–$80+ | Drop-off and pickup |
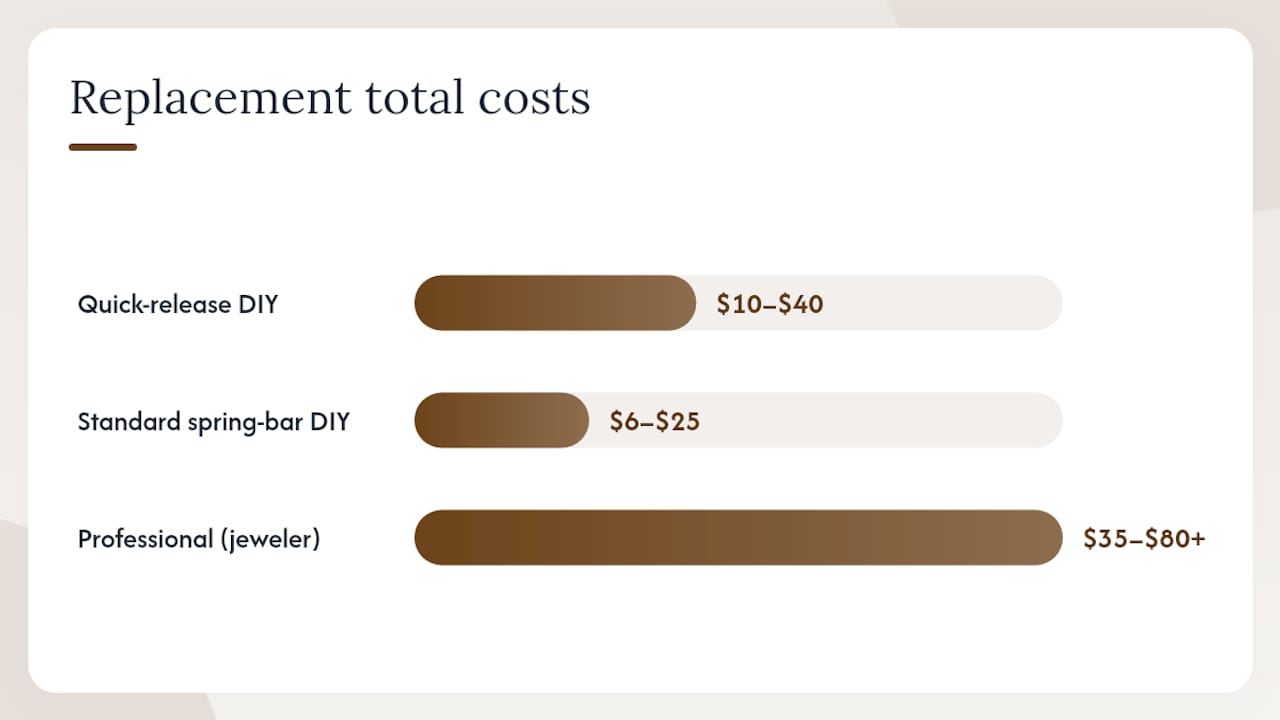
DIY replacement typically costs $6–$25 for the strap plus a basic spring bar tool, versus $35–$80 or more at a jeweler who charges for labor and marks up the strap. The spring bar tool is a one-time purchase that pays for itself on the first swap.
A few cost notes:
- Quick-release straps carry a small premium over standard straps, but the tool-free convenience offsets that for most people.
- Metal bracelets cost more upfront ($30–$150+) but last years longer than leather or silicone.
- Professional service is worth the cost for vintage watches, proprietary systems, or when water-resistance resealing is needed after any case work.
Key Takeaways
Measure lug width or confirm your Apple Watch case size before buying any replacement strap, then choose the attachment type and material that fits your daily use.
| Point | Details |
|---|---|
| Measure before you buy | Lug width in mm for standard watches; case size group (40/41mm or 44/45/49mm) for Apple Watch. |
| Quick-release saves time | Tool-free swaps take under 10 seconds per side; worth the small price premium for frequent changers. |
| DIY costs far less | DIY replacement runs $6–$25 total versus $35–$80+ at a jeweler for the same standard spring-bar swap. |
| Know when to stop | Proprietary fittings, vintage end-links, and water-resistance resealing all require a professional. |
| Wizeband for Apple Watch | Two size groups, 316L stainless steel construction, and an at-home link-removal tool simplify buying and fitting. |
The case for DIY first
The fear of damaging an expensive watch is the main reason people pay a jeweler $50 to do something that takes four minutes with an $8 tool. For standard spring-bar watches, there is no technical difference between what a jeweler does and what you do carefully at home. The jeweler has the same tool, the same spring bars, and the same technique described in this guide.
Apple Watch is even simpler. The slide-release system was designed for users to swap bands themselves. Apple sells dozens of band styles precisely because the swap is meant to be a daily or weekly habit, not a service appointment.
That said, the line is real. Vintage watches, proprietary sport-watch systems, and anything requiring case opening belong with a professional. Knowing which side of that line your watch sits on is the actual skill this guide is trying to give you.
For Apple Watch owners who want a band that looks like jewelry rather than a fitness tracker accessory, Wizeband’s metal bands are the logical next step after reading this. The sizing is straightforward, the finish options are broad, and the at-home adjustment tool means you are not dependent on a jeweler to get the fit right.
Wizeband metal Apple Watch bands: ready to wear, easy to size
If you have an Apple Watch and you want a band that reads as jewelry rather than sportswear, Wizeband’s metal lineup is built for that. The Aura Metal Band uses 316L stainless steel links with a butterfly clasp and a quick-adjust system, available in Silver Gold, Rose Gold, Starlight, and Gold finishes. The Gaia Metal Strap offers a different link profile for a slightly slimmer wrist presence. Both are compatible with Series 4–10, SE, and Ultra 2.
Sizing is handled through two case-size groups at checkout, and the band-link removal tool lets you adjust the fit at home in minutes. No jeweler visit, no guesswork on sizing. Browse the full collection and use the sizing tool to confirm your fit before you order.
Useful sources and further reading
The sources below cover the official and community-standard guidance for watch strap replacement, Apple Watch band changes, and tool selection.
- Watch Strap Replacement — DIY vs Jeweler, Cost & Best Options | dupe.watch
- How to Replace a Watch Strap — iFixit Repair Guide
- Change your Apple Watch band — Apple Support
- How to Change a Watch Strap at Home: A Step-by-Step Guide | Helvetus
- Watch strap Length Adjustment and Replacement | CITIZEN WATCH Global Network
- Screw-back case-back opening wrench for watches
- Case tool for screw-back watches with three bits
The iFixit tug test is the simplest quality check available: after installing a strap, pull it firmly away from the watch. If the spring bar is not fully seated, the strap will release under far less force than normal wear. Do the test every time.
Recommended
From the blog
View all


Leave a comment